RetroComputerInstructionManual
Altair shortcuts
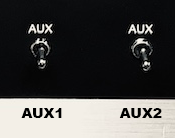
Note: AUX1 refers to the AUX switch on the left, AUX2 refers to the AUX switch on the right.
Access the Altair-Duino configuration screen
- Hold up STOP, keep it held up, and hold up AUX1.
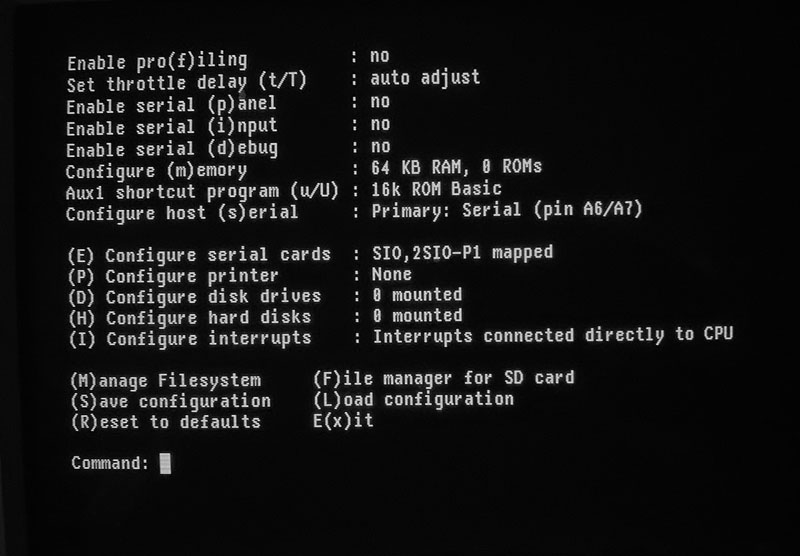
If you have a terminal connected, or your Altair-Duino is connected over USB to your computer, you should see the setting menu appear. This menu is the key to controlling how serial ports work, and also defining default actions when you power on. It’s worth spending time learing what options are available.
Reset default settings
If you get the system messed up by trying out too many options, you can do a “factory reset” of the settings. Either delete the SETTINGS.DAT file on the SD card (pop it into your desktop PC to do it), or as Chris Davis writes: “Follow these steps EXACTLY:
- Connect your Altair-Duino to your computer via USB.
- Launch Terra Term or Putty.
- IMPORTANT - hold the RESET toggle UP and do not release it until step 6.
- Connect to whatever serial port the USB is.
- The front panel lights will flash briefly while it connects.
- Release the RESET toggle.
- Now you have temporarily returned to the default settings. If you would like to save them (I suggest you do) you can go to the configuration menu (raise STOP and AUX1) and save as config #0.
If that does not work unplug it and try step 1-7 again.”
Selecting a default disk to boot
It’s possible to set a shortcut to occur when AUX1 is toggled up once the computer is turned on. By detault this is “Kill the Bit”, which is great if you don’t have a terminal attached. If you do have a terminal, it would be much more convenient to start CP/M, right? Here’s how:
- Open the Altair-Duino configuration screen (see above)
- Toggle option AUX1 shortcut program by pressing u until the option you want is selected. For example, BASIC or CP/M. If you have an SD card installed, being able to start up CP/M from hard drive is very convenient.
- Once you have made your choice, you will probably want to save this as a default setting. See below.
Storing and using default start settings
The Altair-Duino can save multiple settings (which store default serial ports, speed, programs to launch on AUX1 etc.) and you can select these at start-up. Here’s how.
- From the Altair-Duino configuration screen, make your choices.
- Press S to Save configuration.
- Pick a numbers from 0 to 9.
- If you pick 0, these are the settings that apply at power-up by default (i.e. you do nothing but turn on the computer.)
- If you pick another number, you can select these in two ways: first, you can Load them from the configuration screen, but second you can use a power-up shortcut to load them. On the A3 to A0, set the binary representation of the settings number you picked. Then hold up the DEPOSIT button, and while holding it up, switch on the computer.
This is a really convenient way to select different launch configurations, for different terminals or different software. You will probably need to add a sticky-note to the front terminal so you remember which settings, which is fine - all Altairs back in 1975 had notes stuck to them.
List the name of virtual disks
- STOP
| 15 | 14 | 13 | 12 | 11 | 10 | 9 | 8 | 7 | 6 | 5 | 4 | 3 | 2 | 1 | 0 |
|---|---|---|---|---|---|---|---|---|---|---|---|---|---|---|---|
| 0 | 0 | 0 | 1 | 0 | 0 | 0 | 0 | 0 | 0 | 0 | 0 | 0 | 0 | 0 | 0 |
- AUX2 down
If you have added your own disk images, you should add their name to the DISKDIR.TXT file so it appears in the list.
Boot CP/M from floppy
- STOP
| 15 | 14 | 13 | 12 | 11 | 10 | 9 | 8 | 7 | 6 | 5 | 4 | 3 | 2 | 1 | 0 |
|---|---|---|---|---|---|---|---|---|---|---|---|---|---|---|---|
| 0 | 0 | 0 | 1 | 0 | 0 | 0 | 0 | 0 | 0 | 0 | 1 | 0 | 0 | 1 | 1 |
- AUX2 down (to mount the disk)
| 15 | 14 | 13 | 12 | 11 | 10 | 9 | 8 | 7 | 6 | 5 | 4 | 3 | 2 | 1 | 0 |
|---|---|---|---|---|---|---|---|---|---|---|---|---|---|---|---|
| 0 | 0 | 0 | 1 | 0 | 0 | 0 | 0 | 0 | 0 | 0 | 0 | 1 | 0 | 0 | 0 |
- AUX1 down (to boot the disk)
In practice, booting CP/M from floppy works, but there isn’t a lot of free space on the virtual disk, and so it isn’t the most flexible or useful way to work. It’s much better to use an SD card with your Altair-Duino, and boot CP/M from a hard disk.
If you use this option a lot, you should have it is a default start setting (see above).
Boot CP/M from hard drive
- STOP
| 15 | 14 | 13 | 12 | 11 | 10 | 9 | 8 | 7 | 6 | 5 | 4 | 3 | 2 | 1 | 0 |
|---|---|---|---|---|---|---|---|---|---|---|---|---|---|---|---|
| 0 | 0 | 1 | 1 | 0 | 0 | 0 | 0 | 0 | 0 | 0 | 0 | 0 | 0 | 1 | 1 |
- Toggle AUX2 down (to mount the disk)
| 15 | 14 | 13 | 12 | 11 | 10 | 9 | 8 | 7 | 6 | 5 | 4 | 3 | 2 | 1 | 0 |
|---|---|---|---|---|---|---|---|---|---|---|---|---|---|---|---|
| 0 | 0 | 1 | 1 | 0 | 0 | 0 | 0 | 0 | 0 | 0 | 0 | 1 | 1 | 1 | 0 |
Then toggle AUX1 to down (to boot the disk)
If you use this option a lot, you should have it is a default start setting (see above).
What to do if CP/M hangs
Sometimes something bad might happen, and your CP/M system might hang. The fix is easy: just toggle the RESET switch. Reset sets the program counter back to 0, and so it restarts CP/M. However, if something really, really bad happens you might have to reboot CP/M.
Mounting disks
Remember: you can use mount and unmount floppy or hard disks at any time - even in the middle of a CP/M session. It’s only simulating the physical act of adding or removing a disk from the disk drive.